Making your own custom skin for Minecraft can be quite tricky at first but once you read our detailed guide, you will be able to create skins with ease. Playing Minecraft on your terms, whether you want to install mods, texture packs, or even use a custom skin, the amount of creativity and variety is amazing for all players wanting to express their creativity in-game.
We will go over all of the steps you need to take to create your own skin for Minecraft. Customizing your skin can be quite fun as you can go for a simple design without shading, up to a very colorful and in-depth skin. The possibilities are endless.
You can view skins as a collection of pixels, all representing the body of the character with four different aspects that make up a skin:
- The Head which has 6 visible sides
- The Body's Torso which has 4 visible sides
- The Arms which have 6 visible sides
- The Legs which have 5 visible sides
Advertisement
How to Make a Custom Minecraft Skin
In just a few simple steps, you will be on your way to creating awesome skins in no time.
1. Choosing a Skin Editor
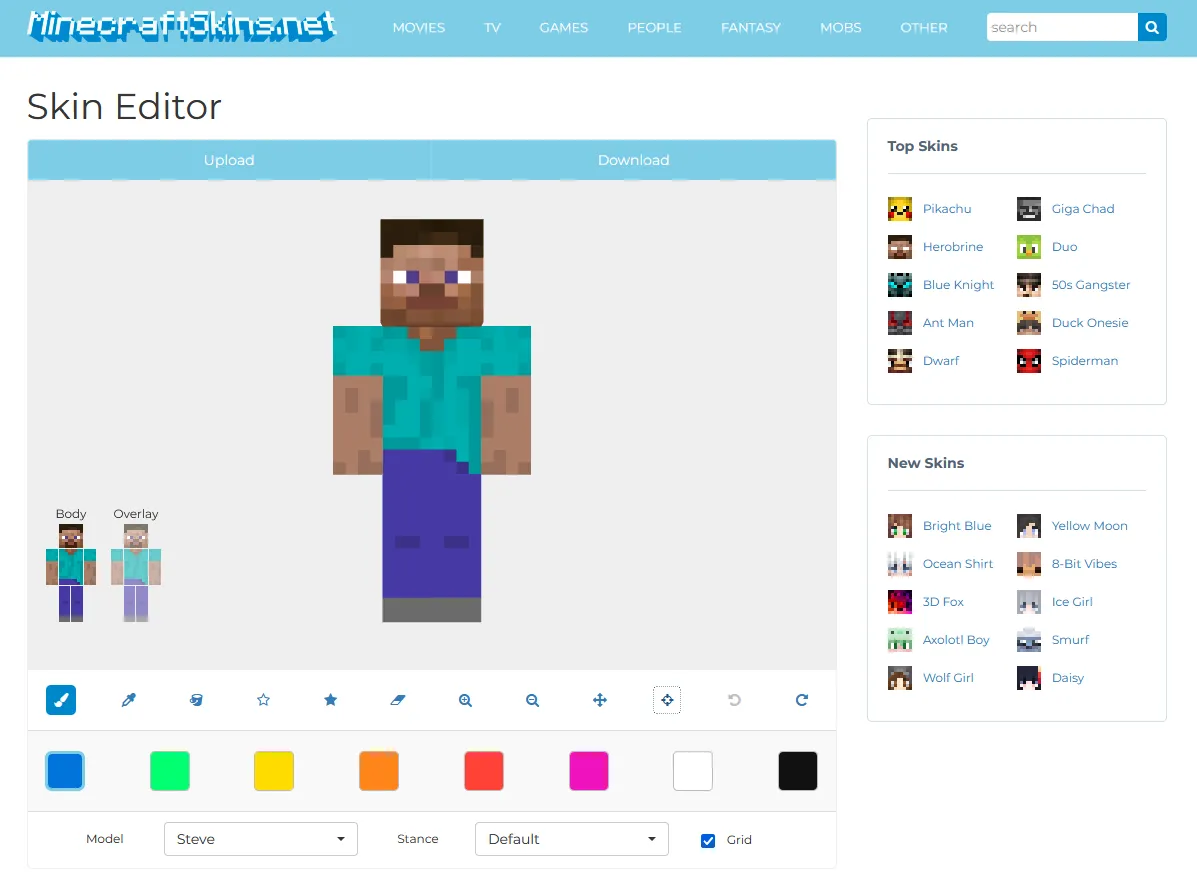
Although there are many sites you can use that allow you to create and customize skins, like MCSkins, we recommend using MinecraftSkins as it is very easy to pick up. Once there, you will see the default Steve skin to use as a template.
Advertisement
2. Try out All of the Tools
You have a lot of options in terms of customizing your skin, you can pick the model (Steve or Alex) along with taking a look at all of the different stances to help you pick the correct colors and design for your skin. Here are some helpful tips:
- You will see the Body and Overlay options. These will select whether you would like to add let's say armor to your character or just customize the base skin.
- By holding the left mouse button, you can rotate skin.
- You can zoom in and out so you can have an easier time editing the fine details of your skin.
3. Pick a Template and Start Creating
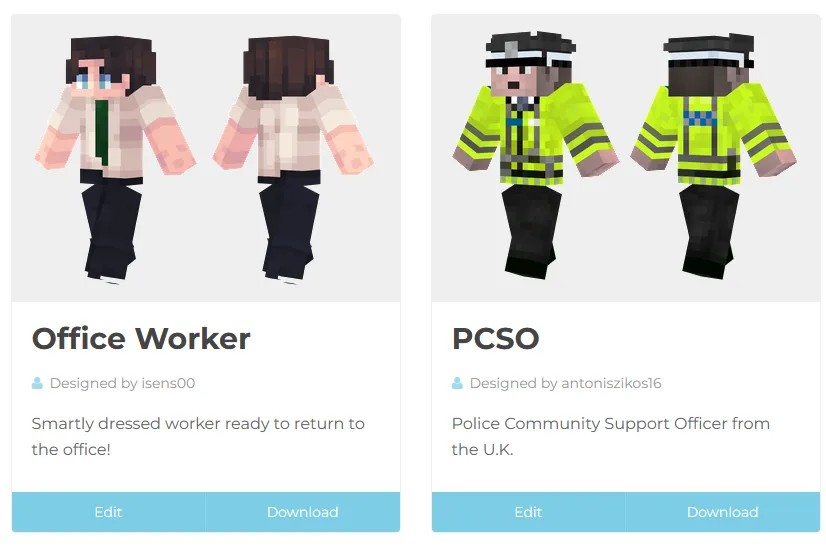
You can go over some of the top skins that are available on the site so you can have a headstart or you can build your skin from the ground up. Either way, you will certainly have a fun time exploring creative ideas and trying out things that work best for you.
4. Pick a Color Palette
Once you have a general idea of what skin you would like to make, you must pick the right colors as most skins usually use similar shades that give texture and depth to your skin.
In MinecraftSkins, you can use the star buttons that either increase or decrease the brightness of the color so you can try out different shades.
Advertisement
5. Start Adding Details
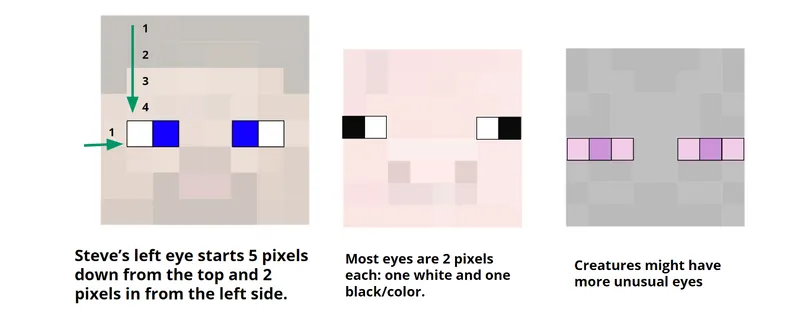
Once you have filled in most of the pixels of your skin, you can start customizing your hair, face, eyes, you name it! Luckily, the zoom-in and out options will help you focus on certain areas without having to worry about messing up other parts of the skin.
6. Finalize Your Skin and Install It
After you have completed your skin, you will be able to download it from the site directly as a .png file. You can see how you can install skins in Minecraft by taking a look at our in-depth guide, here.
And that's all you need to know about making your own custom skins for Minecraft. Although it might seem difficult at first, once you get the hang of it, you will be creating great skins in no time.
Remember, practice makes perfect so make sure to test out every idea you might have as you might make an amazing skin that even other players will start downloading! Go create your perfect skin and remember to have fun showing it off to your friends.
Advertisement